I use spray paint.
A lot.
It’s perfect for smaller pieces that may have a lot of nooks and crannies which aren’t suitable for a paint brush or roller. Plus the finish is smooth and durable.
Many spray paints can even be used on plastic, wood and metal.
Here are a few of my past spray painting projects…
Insane, I know, but I brought home some more chairs from another school auction.
45 to be exact.
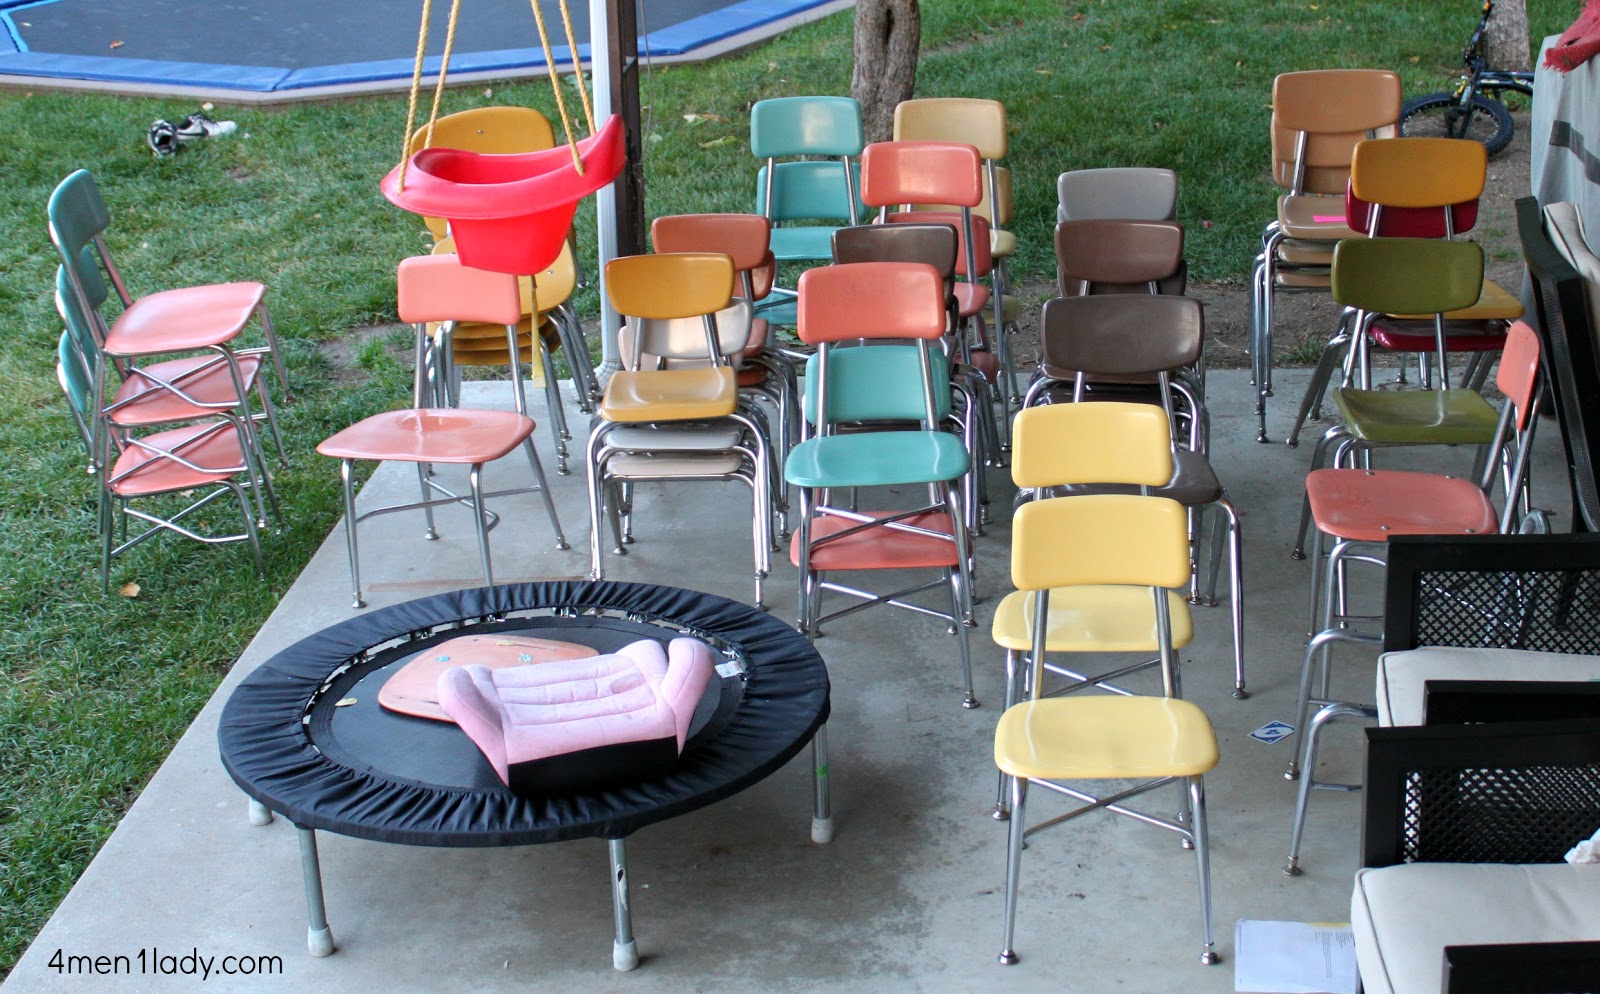
I had such a mad rush for my last chairs that I thought I’d try it again. Some people missed out on the colors they wanted so I suggested painting them. They gave me that fake, “not in a million years” smile in response. So I’m going to paint a few chairs just to prove it’s not has tough as one might think. Spray painting is a bit of an art though. I have people ask all the time what’s the trick to getting it right.
These tan chairs were last to go so I thought I’d jazz them up with some paint.

The most involved process about spray painting is the prep work and dry time. I know you’re all excited to dive right in but if you don’t take the necessary prep steps, you’ll regret it. Patience is the key to a successful paint job.
Step one: clean your surface.
I normally just use Windex and a paper towel to clean the surface.
If you have a tough something on there you may want to use a razor blade, wire brush and rubbing alcohol to remove it.
Step two: lightly sand and prime.
I don’t always sand (I didn’t here) but it’s sometimes a good idea to help the paint adhere better.
Some paints will say “no sanding required”.
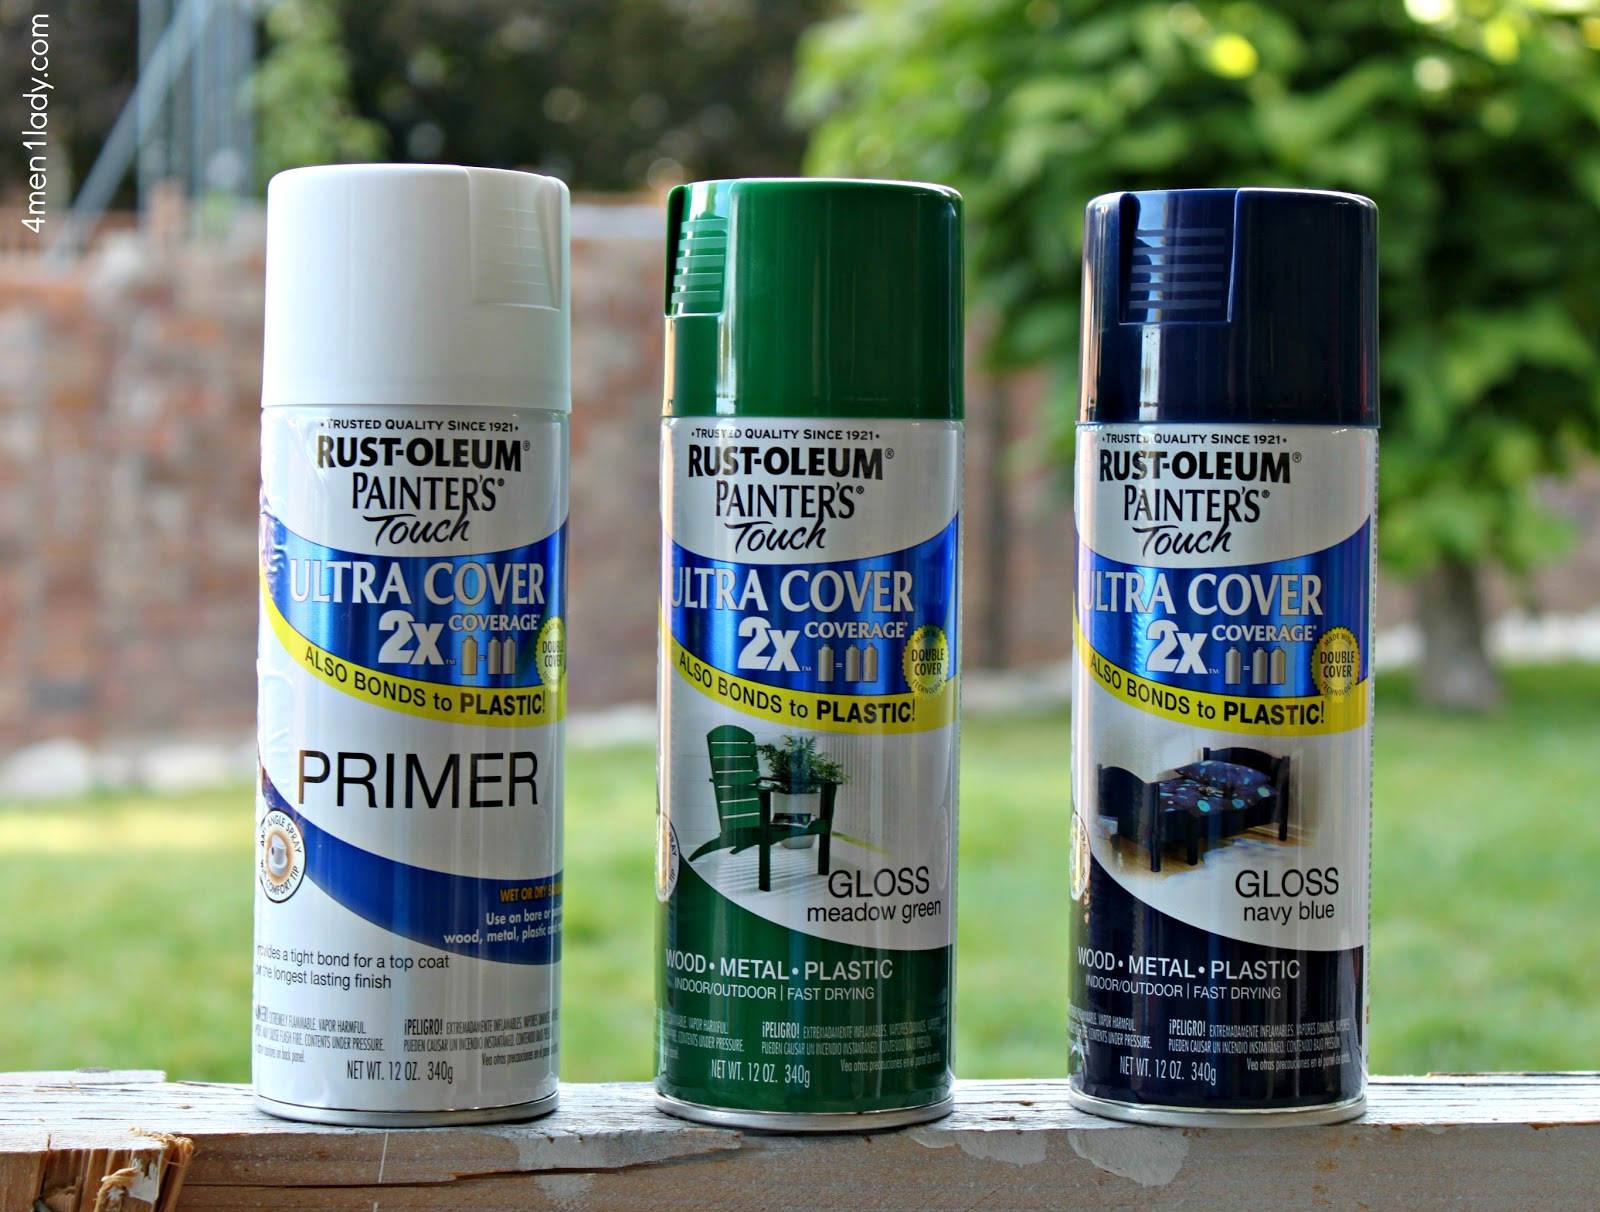
Another important key to a successful paint job is picking a quality paint.
I’ve used them all and my favorite is Rust-Oleum (not being paid to say that).
It has the best consistency and finish in my opinion.
So here’s the key to spraying (whether priming or painting)…
-Make sure the temperature is between 50-90 degrees and humidity is below 65%.
-Spray in a well-ventilated area.
-Hold the can 10-16 inches away from your project.
-Hold your can so when you first spray you are spraying OFF the project on to your drop cloth.
-In a steady motion go from one side to the other side stopping when you get OFF your project and on to the drop cloth. People get in trouble by starting on the edge, over spraying the sides, then end up with drips.

-Your first coat should look like the surface has barely been kissed by the paint. It will look uneven and the original surface should even peek through. You want to do several LIGHT coats giving time to dry between each coat.
Step 3: Let dry.
Duh, right?
Believe me…this is a hard step. You’ve got momentum and excitement and you want to jump right in to fun part. The longer you can wait the better it will be for the adhesion of your paint. Rust-Oleum recommends waiting 24 hours as well as stating, “On plastic, maximum adhesion and durability is achieved in 5-7 days.”
UGH!
I normally try and wait at least 24 hours. (I try).
Step 4: Paint.
Simply repeat the same steps and techniques you used to prime.
I can’t stress enough a steady hand, multiple LIGHT coats and waiting between drying cycles.
If you do it right you should have a smooth consistent surface.

Damage Control:
The most common problem is dripping or bubbling.
This could be caused by cheap, thin paint or a heavy finger on the spray nozzle.
If you get drips… first: curse.
Next, wipe away immediately.
Next, wipe away immediately.
If it has already dried you can sand it all the way down to the bare surface and start over again.

I couldn’t just do a solid coat of paint, now could I?
Had to stripe it up.
My tape of choice is Frog Tape for painting stripes because it has “paint block” which prevents bleeding.
Make sure to rub the edges of your tape down firmly then spray with a contrasting color.
*If you’re really worried about bleeding you can spray with the same base color after you’ve taped. This way if there is any part of the tape that didn’t get firmly pressed down the paint will make a seal so when you do use your contrasting color there will for sure be no bleeding.
*If you’re really worried about bleeding you can spray with the same base color after you’ve taped. This way if there is any part of the tape that didn’t get firmly pressed down the paint will make a seal so when you do use your contrasting color there will for sure be no bleeding.


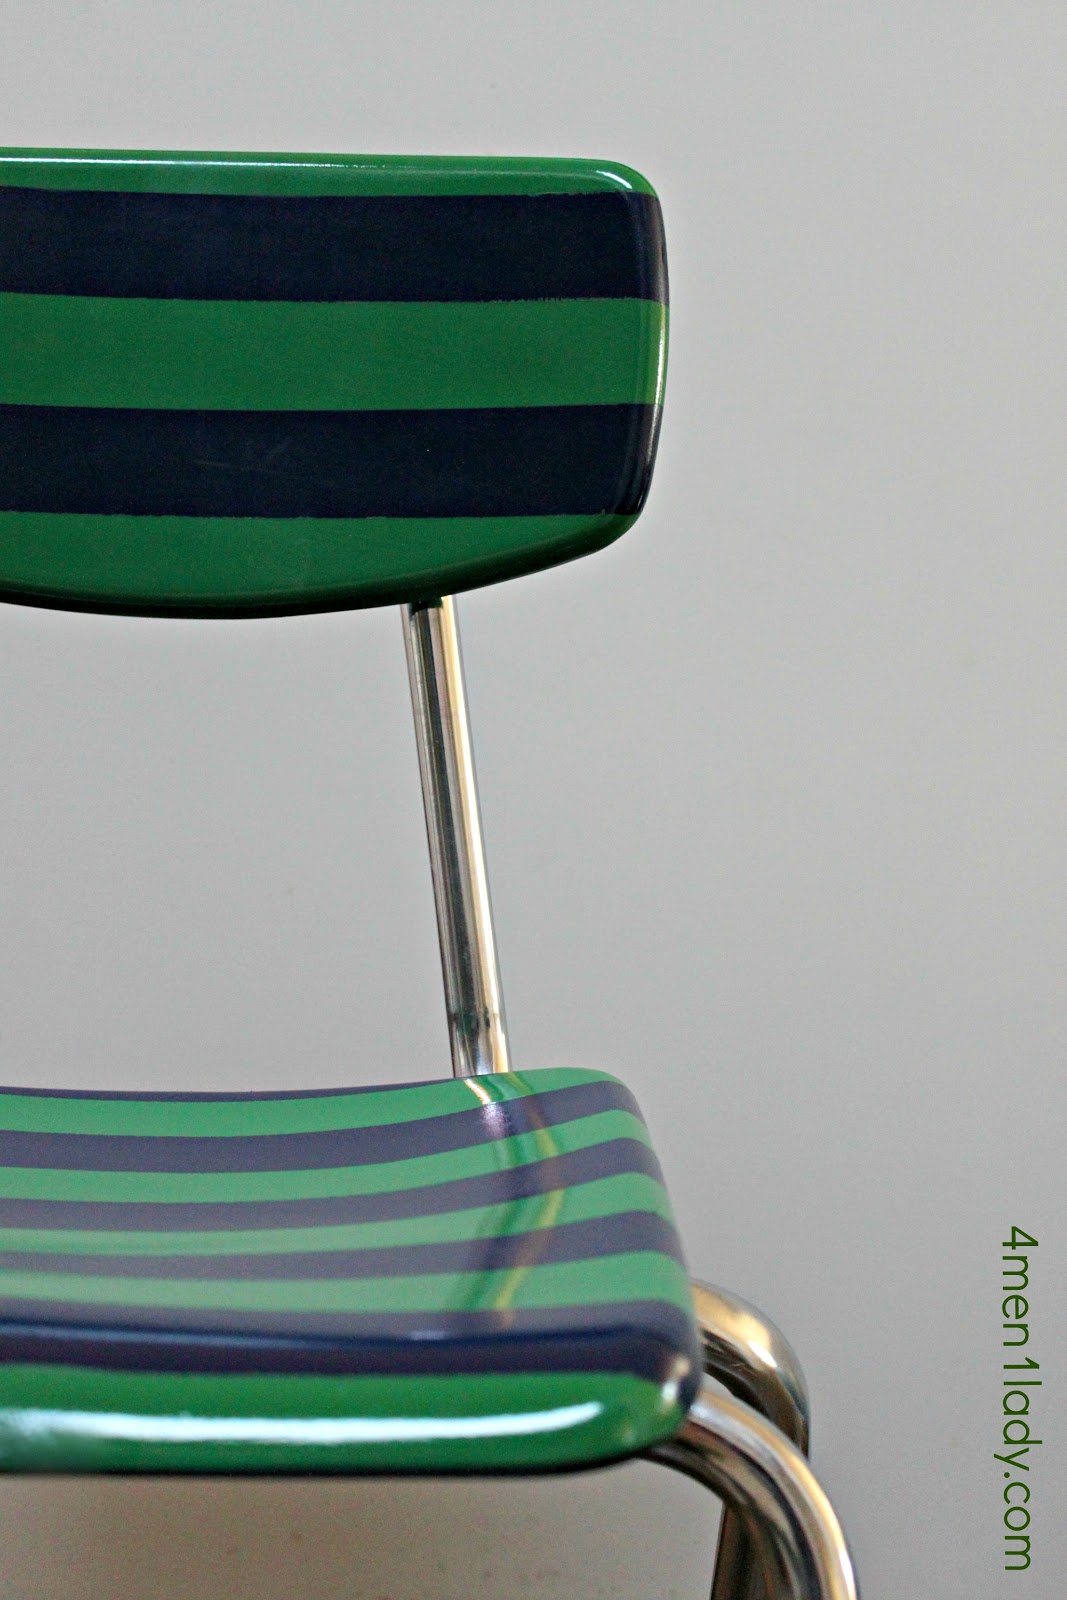
Voila!
If you’d like to purchase a school chair or two and you live in Salt Lake City, UT give me a hollah at smhinckley at yahoo dot com.
Sorry. No shipping at this time.
(Sorry folks. If you’ve already purchased from the original batch of chairs I apologize, but there’s no exchanges.
When I finally open up that store I’ll be able to accept exchanges. Wink).
I was given tape by Frog Tape.

*If you liked this post, please consider Liking, Pinning or Tweeting below. Thank you!*


 Hey there! I’m Michelle; I’m an Passionate DIY’er and in constant pursuit of how to bring beauty to my house full of men (3 boys + 1 hubby). Stick around and see what I’ve got up my hard-working sleaves!
i like spray painting too and my problem when I first did it was i started on the edge and had overspray… 🙁
anyway – that chair turned out pretty in stripes!
huggies***
smartmomma
Does anyone spray a clear laquer as last coat to protect paint from scratching off?
I’ve actually done that before. It’s a good idea!
As always – you NEVER disappoint!
These chairs are just ADORABLE! I love seeing basic, durable, and classic pieces customized in a manner we have not previously considered. This exercise will get the imagination of many parents who would love to customize a basic piece such as this for their young students.
Your instructions are dead-on correct. The key thought is ‘have patience’ between spraying applications and do not be heavy-handed in each application and you will not be disappointed with your results. Trying to undo / redo botched work is not fun!
That school chair looks awesome. Question for you: Do you wait 24 hours between each coat?
24 chairs sound like a win!
Awesome project and great idea to pass on for an outdoor brunch or large gathering.
Mr. Goodwil Hunting
I got really excited when I saw the lime green stripes then I realized at was just the tape 🙂 Is makes me want to find something to spray paint! Thanks 🙂
It’s so nice to see how great things SHOULD look when spray painted!! LOL I will just have to follow your instructions exactly next time I have a project! Thanks!
Stripes!! Such a great idea!!
Great post! I had to learn step 2 the hard way 🙂 so important to prime. And when you want instant gratification waiting is expecially hard to do! 🙂
Fantastic job on those chairs! Judy
How about holding one for a friend? Maybe it will get me out there faster 🙂
they look great!!
Any suggestions for when it’s cold as all get out outside and you still want to spray paint? 😀 It’s close to freezing here and I’m ready to go at it in my garage or on my back porch on a few small things.
I go in my garage and shoot a space heater on my project until it’s dry. Best of luck…wishing for spring so we can all get back out and spray paint!
The stripes really take the chair to the next level
Thanks Desean!
And a question, how do yo disassemble the chair to spray paint it? I have a chair similar to the salmon colored one in the right side of the pick where you can see the metals that hold the chair in place.
You just have to turn the chair around and upside down and twist the screws out. Happy spraying!
There are some small rust spots on my school chair legs, can I paint the metal legs?
My school chairs have some small rust spots on the legs, can I paint them?
Absolutely. Most spray paints are great on metal. My fave is Rustoluem. Check your can’s label. Happy painting!
Do you use one coat of primer?
I always think its a good idea to use primer when spraypainting. You will find that most spray paints now are a paint and primer in one.